


Hotels are upping the game with unexpected fillings, fancy shape and even boozy versions of the warm chocolatey treat — here’s how to recreate the magic at home.
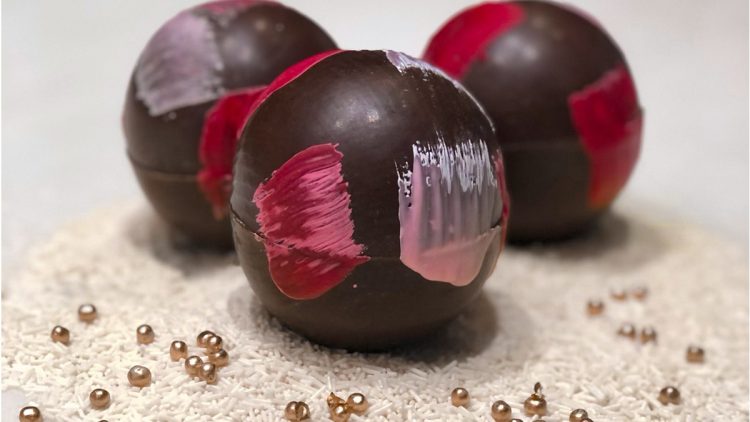
Hot cocoa bombs, those fun spheres of chocolate filled with marshmallows and hot chocolate mix that melt when topped with warm milk, are a cozy, luscious trend this season, popping up in bakeries, restaurants menus, and many a Tik Toker’s feed.
Pastry chefs from Hotel Bennett in Charleston, SC and The London West Hollywood in Beverly Hills share their secrets for creating morphing winter beverages that are really the bomb:
Start with high-quality chocolate… and a touch of vanilla
Both Anthony Keene, executive chef at The London West Hollywood at Beverly Hills, and Rémy Fünfrock, executive pastry chef at Hotel Bennett, swears by cocoa powder and 64% dark chocolate produced by Valrhona, one of the top producers of French chocolate that dates back to 1922. Fünfrock’s secret for added sweetness is mixing the cocoa powder with vanilla sugar, which he makes by macerating white sugar with a seeded vanilla bean pod for three weeks or until fragrant, shaking the container every three days. If you don’t mind the look of flecks of vanilla in your mug, you can replicate this process at home much more quickly by mixing the scraped seeds with white sugar.
Use a candy thermometer or one of these two work-arounds, and don’t skip one crucial step
“If it is too hot, the chocolate will drip down the sides of your mold causing the sides to be too thin and break, and the center to be too thick and it will have a hard time melting,” explains Fünfrock.
If the chocolate is too cold, the shell will be too thick and have a hard time melting. There are three ways to tell if your chocolate is the perfect temperature for your mold, he says. The most accurate is to check it with a candy thermometer; dark chocolate should be melted to 91 degrees to 93 degrees Fahrenheit, milk chocolate to 88 degrees to 91 degrees and white chocolate to 82 degrees to 84 degrees. If you don’t have one, use your hand: If you barely feel any warmth, the chocolate is ready. Or you can dip a spoon into the chocolate and let it run off: If the ribbons left in the chocolate stay for between three and four seconds, it’s ready.
“The biggest step we take to set our chocolate apart is we hand/table temper our chocolate, meaning we heat and cool the chocolate to stabilize the cocoa butter,” he adds. “A properly tempered chocolate will have a shiny and glossy finish with a creamy texture.”
Build a better bomb with these tools and ingredients.
Fünfrock suggests ordering any size or shape of silicone mold; spheres are standard, but you can also make bombs with stars, squares, pyramids or holiday shapes. Keene has added fondant or marzipan to shape them into miniature snowmen, filled heart-shaped bombs with meringue kisses and even made clear spheres filled with tea infusions. As Fünfrock says, “there is no limit to the shape and design you can make as long as you can connect and seal both halves.”
Use a paint brush to paint the chocolate into the mold for the shell, which will give you more control than pouring it, and aim to make the bomb as thin as possible yet still structurally-sound, so it stays together and holds the filling yet quickly and dramatically melts.
If tempering makes you nervous or you don’t have time, substitute bags of chocolate melt disks available at craft stores; they will lack the intensity of flavor of brands like Valrhona, but they are easier to work with. If you are using commercially-made hot cocoa mix, select a high-quality brand like Ghirardelli or make one from scratch.
Gussy up the outside, and think beyond the marshmallow.
Add colored cocoa butter to white chocolate or purchase pre-colored chocolate melts to create colored areas and designs on the outside of the bombs. And for something less expected than mini marshmallows fill them with sprinkles, chocolate chips, crushed peppermints or even cinnamon red hots or crushed butterscotch candies. Just be sure not to overload the bomb or it won’t melt properly; only one half should be filled to allow the steamed milk to melt the shell evenly.
Make it a boozy bomb.
Elevate the treat from one for the school-aged set to the over-21 crowd by adding a splash of liqueur to the serving cup — not the bomb itself, which may melt or buckle.
“We offer the option to add Six & Twenty Carolna Cream or Godiva liqueur enhancing the chocolate flavor to the steamed milk,” Fünfrock says. “Any type of Irish Cream liqueur or even a coffee liqueur will intensify the flavor of the chocolate.”
Keene suggests filling the bombs with whiskey jellies. You can also do a version of Vert Chaud, a French après-ski cocktail, by adding two ounces of herbal Green Chartreuse to the milk before activating the hot cocoa bomb, and topping it with freshly-whipped cream. Ooh la la!
Next Level Hot Cocoa Bomb
Recipe courtesy of Rémy Fünfrock, Executive Pastry Chef, Hotel Bennett, Charleston, South Carolina
- 2 tablespoons Valrhona Cocoa Powder
- 2 ¼ teaspoons vanilla sugar (see Note)
- 10 mini marshmallows (can substitute with enough chocolate chips, sprinkles, crushed peppermints, cinnamon red hots or crushed butterscotch candies to fill half of the chocolate mold)
- ½ cup (or more) 64% Valrhona Dark Chocolate
Directions: Sift together the cocoa powder and vanilla sugar. Melt and temper the dark chocolate until it reaches a temperature of 93 degrees Fahrenheit. Paint a silicone mold with dark chocolate (you will have extra melted chocolate) and allow it to solidify. Remove chocolate from the molds and fill one half of the mold with the desired fillings, being careful not to overfill. Paint a small line of melted chocolate on the edge of one half of the mold, then use more chocolate to seal the other half. Cool the bombs completely. To serve, place the bomb in a mug, boil milk or water, pour over the cocoa bomb and enjoy.
For the vanilla sugar: Take ½ cup white sugar and 1 seeded vanilla bean and place into a container with a tightly-fitting lid. Shake every three days for three weeks or until desired flavor is achieved. (To make the vanilla sugar more quickly, add half of the seeds from 1 vanilla pod to ½ cup sugar, and stir to combine. Or, purchase a commercial version from Native Vanilla.

